

Following on from my previous article about Team Foundation Server 2013 Preview, I’m now moving on to Visual Studio 2013 Preview.
I’ve installed on the same VM which now hosts Team Foundation Server 2013 Preview, selecting only a small subset of the available options.
I’m mainly interested in Web Development, Data Tools and Windows 8 Development. There are quite a few additional options though, including Blend, LightSwitch, Silverlight, Office development tools, the Windows Phone 8 SDK and Microsoft Foundation Classes (MFC) for C++.
Introducing Visual Studio 2013 Preview


The very first thing you’ll notice when firing up Visual Studio 2013 Preview for the first time is that you are prompted to sign in with a Microsoft Account. Presumably this is to fully integrate you with the Microsoft Account that you use with the Windows App Store. I’ll skip this for now.
The next step is to decide what configuration you’d like most. I’m going to go with C# development settings for now. You can also choose from Dark, Light and Blue colour schemes, but based on Visual Studio 2012, I’m going to assume that you can still import your own theme/styles.

It can take a little while to get started the first time around.
A First Look
Once it is ready, Visual Studio fires up, and we can see that it isn’t that dissimilar from the previous version. Unfortunately, there are those ugly ALL CAPS menus, but I’m hoping that this can be changed via a menu option (although nothing jumps out at me).

Default Layout of Visual Studio 2013 Preview
A quick scan through the options dialog reveals the Microsoft Git Provider, sitting alongside the more traditional Team Foundation Server setting for source control.


Some of the options require the installation of additional SDKs, for example, the Windows Azure SDK.
For more information on Using Visual Studio 2013 Preview with Windows Azure, check out the following page.
What you’ll be needing is the Web Platform Installer 4.6, and you can execute it through Visual Studio or download the web installer and go from there.
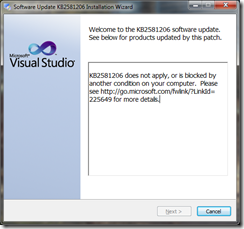
Here’s my experience in installing the Azure SDK toolkit:


Once you’ve installed the Azure SDK, you’ll see there’s a lot of extra options you can install.

Next Steps
Well, the next article will show a bit more about the process of actually developing some code within Visual Studio 2013, and we’ll dip into TFS and Git source control as well.

One thought on “A Look at Visual Studio 2013 Preview”
“the first time is that you are prompted to sign in with a Microsoft Account” ? Really?
What a piece of junk. Is not enough that Visual Studio is way behind Netbeans and Eclipse with a lot of features but now you are forced to “report” when you are using it?
I think we are stupid to “wonder” to this pile of garbage 🙁