Today I installed the new Windows 8 Release Candidate build into a virtual client. The installation procedure was more or less identical to the installation experience for the Windows 8 Consumer Preview, so I won’t go into detail on how that works.
My main intent was to view the differences between the Public Beta and the Release Candidate edition. However, this time I decided to install the Visual Studio 11 Release Candidate as well. There’s been a lot of discussion about the upcoming release, and this is my first real look at the improvements and changes.
The Installation
First, props to the Windows 8 team for including native support for mounting .ISO files. This makes the process of preparing to install Visual Studio 11 far easier:

From here it is a simple matter of launching the installation program (with elevated credentials). This is the first time we’ll see the new Visual Studio 11 logo:

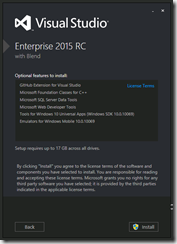
Which launches a revamped installer in the new metro look and feel. First thing to note is that, by default it seems that Visual Studio wants over 8 GB of your hard disk space (so plan accordingly!).
In the RC, participation in the Customer Feedback programme is not optional. Agreeing to the terms and conditions takes you to a page where you can opt in or out of some additional options for Visual Studio 11.


The rest of the installation can then proceed. The slick new visuals give you a good idea of the progress. Now.. I opted to install the whole enchilada (all options) and it took about 15 minutes on a machine with a 2.50 GHz (virtual) processor and 2096 MB of RAM (and a VHD mounted on a RAID-5 volume). Your experience may vary.


Post-Installation
Once we hit the massive bold “LAUNCH” option at the end of the final screen, we get the familiar screen asking us to configure Visual Studio with a default configuration option. There are a couple of new options here, but I’ll just stick with my tried-and-tested ‘General Development Settings’ for now:

Once we elect to ‘Start Visual Studio’ we are greeted with the pain-in –the-ass configuration dialog – the developer’s nemesis since the days of integrated offline help index merges were introduced:

Once this annoying dialog has completed whatever it does, we get to see the Visual Studio 11 IDE in all its glory.

But wait! Why is Visual Studio SHOUTING AT ME? No, you haven’t inadvertently hit the ALT key (which used to capitalise menu items).. this is the default for menu items in Visual Studio 11.

Don’t worry, as Richard Banks discovered (thank mercy) – a simple registry key can fix all that. Open RegEdit and enter the following key:
HKEY_CURRENT_USER\Software\Microsoft\VisualStudio\11.0\General\SuppressUppercaseConversion
REG_DWORD value: 1

Now all you have to do is restart Visual Studio for the change to take effect:

Next Steps
The next step is.. we’ll switch over to our Windows Server 2012 Release Candidate and install Team Foundation Server (TFS) 2012 Release Candidate, so that we have our entire Application Lifecycle Management (ALM) solution fully deployed and ready.
Once TFS is installed, we’ll return to the Visual Studio machine and install Team Explorer. Then we’ll take the whole lot for a bit of a “development spin”. Join me for Part 2 shortly.
Links
For links to where you can download the release candidate versions of Windows 8, Visual Studio 11 and Windows Server 2012, refer to this article: http://www.sanderstechnology.net/2012/big-release-candidate-day-microsoft/11192/