Introduction
Following on from the previous article, where I installed the Visual Studio 11 Release Candidate on a Windows 8 Release Candidate, I’m now going to step through the process to set up a complimentary ALM capability – Team Foundation Server 2012 (Release Candidate).
As per the previous article, links to the downloads for all products mentioned are listed in the following article.
Preparation
I’ve installed a copy of the Windows Server 2012 (Datacenter) Release Candidate as the host for my TFS installation. This configuration will not support SharePoint Foundation 2010 – so this is not a recommended configuration if you want to use Team Projects/Team Sites.
As I was preparing to install TFS, I copied the .ISO files across from my SAN, and noticed something interesting on Windows Server 2012 RC – the file copy dialog reveals a lot more information on the progress of the file copy operation:

Once you have mounted and run the initial TFS 2012 RC installer, there is an initial configuration of the base setup files, followed by the TFS configuration screen.


The initial option is to display the “Standard Single Server” configuration option:

Pre-installation
I’ve pre-installed SQL Server (so I can add reporting services later), but I’m going to use the “Basic” TFS configuration, since I won’t have SharePoint configured. If you also want to pre-install SQL Server, the configuration you are likely will require is per the below screenshot:

Once again, it is always a good idea to familiarise yourself with the TFS prerequisites which can be found in the TFS install guide which is found in the root of the TFS disc.
The Basic Configuration
Anyhow, continuing onwards – as I mentioned earlier, I’m picking the “Basic” configuration (I’ll do a series of articles on setting up a complete solution once Team Foundation Server 2012 goes RTM).

This leaves us with very few things to configure. Literally, all I need to do is decide whether I’ll let the installer use SQL Server Express, or to point at an existing SQL Server instance.

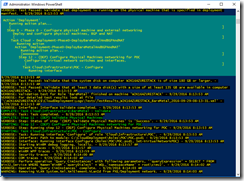
The configuration is verified, and once you hit the “configure” button, the configuration is executed:


Finished!
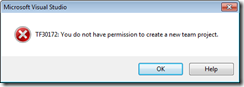
When the configuration is complete, you should be able to connect to TFS from Visual Studio 11 directly (no need to install Team Explorer separately!). In my case, I connected as an Administrator, but you would obviously want to create some users and groups.


In the next article
Now that we have Visual Studio 2012 connected to TFS 2012, we can create a Team Project and begin a project! I’ll go back and establish Reporting capabilities in a later article.