Overview
The recently released Windows 8 operating system contained support for an interesting approach to running your operating system – off an external bootable device. This article will show you how to boot your operating system using an external USB drive.
If you’re not sure what Windows To Go is all about, you can read up on it at this TechNet page located here.
A Note About Performance
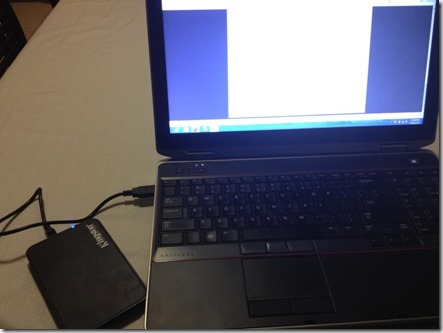
Note that I tried this two ways – with an external 128 GB SanDisk SSD (Sata 3 by way of a USB caddy) and via a Patriot USB stick (also 128 GB). The I/O on the USB stick was WAAAY to slow to boot an entire OS off… the SSD was blazingly fast and runs as if the drive was internal off a SATA connection rather than legacy USB 2.0.
If you want to check whether the device you’ve chosen has a chance at running Windows To Go, you can test the device for suitability. Check out details from this page at TechNet.
Preparations
To begin with, you’ll need to make sure your USB device is bootable. There are a few ways to do this, but I’m not a big fan in restating, so you can check out my previous article on making a bootable USB key here. Just ensure that the device is clean and ready to go. You’ll want this device blank at the beginning.
You’ll also need parts of the Windows Automated Installation Kit (WAIK). The thing is, you don’t need the whole SDK, you only need a handful of the files in the SDK. To speed up the process of obtaining the files you need, I strongly recommend downloading the utility at this site, and it will pull down the SDK files for you.
Either way, you’ll need these files from the SDK:
Directory of C:\GetWaikTools\Waik_4\x86
153,088 bcdboot.exe
327,680 bcdedit.exe
117,688 bootsect.exe
603,648 imagex.exe
119,296 oscdimg.exe
541,184 wimgapi.dll
34,248 wimmount.sys
34,248 WimMountInstall.exe
446,976 wimserv.exe
You’ll also (of course) need a copy of Windows 8. When you have one (assuming it is an ISO image), mount it in whatever image mounting software you have (I use MagicDisk). If your native OS is Windows 8, you can just right click on the .iso file and select “Mount”..
Begin the Process
Once you have what you need, we’ll begin the process. Make sure your Windows 8 installation media is mounted. I’m using the following settings (for reference to the DOS commands below):
| Drive | Purpose |
| C:\ | Operating System |
| F:\ | Mounted copy of Windows 8 Media |
| E:\ | Target USB device |
We’ll be able to tackle this in three somewhat easy steps.
1.
Ensure you know which OS image you want. Some media contains multiple images (like Windows Server).
The following command (using the table above) will show you how many images are in your source media.
Open a command prompt (as Administrator) and ensure you run from the location of the WAIK utilities.
C:\GetWaikTools\Waik_4\x86>imagex.exe /info f:\sources\install.wim
ImageX Tool for Windows
Copyright (C) Microsoft Corp. All rights reserved.
Version: 6.2.9200.16384
WIM Information:
—————-
Path: f:\sources\install.wim
GUID: {}
Image Count: 1
Compression: LZX
Part Number: 1/1
Attributes: 0xc
Integrity info
Relative path junction
Available Image Choices:
————————
<XML/>
2.
Select the image you want to use (usually it’ll be 1) and then run the following command (in this example, where 1 is the image number from the source media).
Note: this can take hours if your device isn’t very fast. A slow device is generally unsuitable for booting as an Operating System. If the operation below takes more than a half hour, your media might be too slow. Mine took just under 20 minutes.
C:\GetWaikTools\Waik_4\x86>imagex.exe /apply f:\sources\install.wim 1 e:
ImageX Tool for Windows
Copyright (C) Microsoft Corp. All rights reserved.
Version: 6.2.9200.16384
[ 100% ] Applying progress
Successfully applied image.
Total elapsed time: 19 min 55 sec
3.
To transfer the system to the root of the device you’ll need to run one more command:
C:\GetWaikTools\Waik_4\x86>bcdboot e:\Windows /s e: /v
Boot files successfully created.
C:\GetWaikTools\Waik_4\x86>
Finished
Right! Well, that’s the hard part done. Reboot your machine leaving the USB storage attached. Make sure you have boot options which enable you to boot from USB before your primary hard drive. Some machines (especially laptops) allow you to override the boot order by pressing a function button (typically F12).
Once you’ve rebooted boot from the USB device and Windows 8 should boot off your external drive. It’ll go through a setup process and require a reboot (don’t forget on the reboot to boot from USB).
Once in, you should be running your OS from the external storage. It’ll make use of the machine’s devices, but you can detach the USB (powered down first, of course) and use it on other machines (without having to set up again). I’ve tested this on two separate Laptops (with differing CPUs, video cards).
In fact, I’m writing this article on a Windows-To-Go operating system!

Help and Support
There’s a Windows To Go Forum hosted at TechNet.


2 thoughts on “Creating a Windows To Go bootable USB operating system”
I appreciate you taking the time to write a tutorial. However, this is the most un-detailed tutorial I have ever read. We aren’t geniuses. Maybe try to explain exactly what we need to do. You skip through massive parts expecting us to know.
Hi Zack,
Thanks for leaving a comment. Putting aside that this wasn’t written as a tutorial, what massive parts are skipped through? I tend to prefer to use brevity over large bricks of text. If you can’t follow what I’ve written, I’d suggest some additional reading about the aspects you’re unfamiliar with.
Rob