Introduction
Continuing from the experience with Visual Studio 2017, the next edition – Visual Studio 2019 has been out for a while now. This edition follows the continuing trend established a few versions ago in providing two channels of licensing – by using a Microsoft Account or by supplying a product key. Although the process is almost unchanged, there are yet still some changes so here I am with the next iteration of “registering Visual Studio 2019 with a product key”.
This applies to the full install of the Visual Studio IDE, as opposed to VS.Code which is another proposition entirely.
Install Visual Studio 2019
I’m going to assume that you’ve already fired up the VS installer and chosen the dev packages you wish to install and that it all completed successfully.
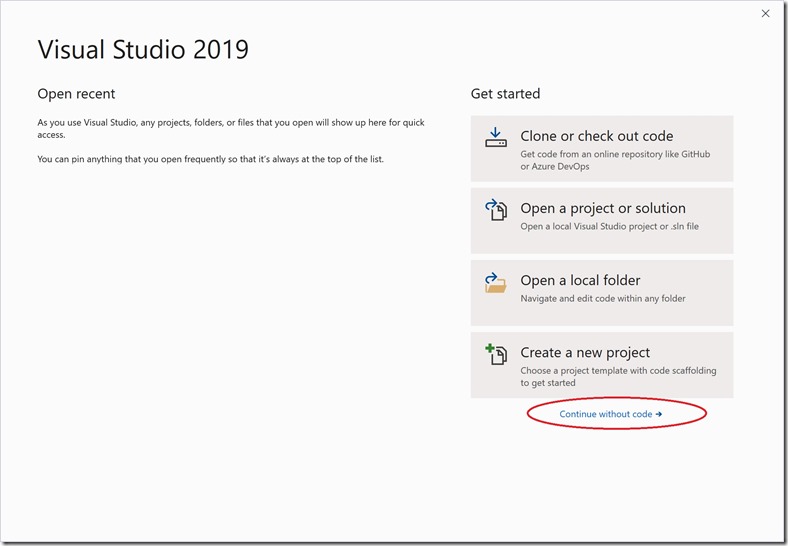
You’ve now fired up Visual Studio, hit the new splash screen and are looking at the VS.Code landing page:
Click on “Continue without code” to fire up the VS IDE. The IDE loads to an empty shell.
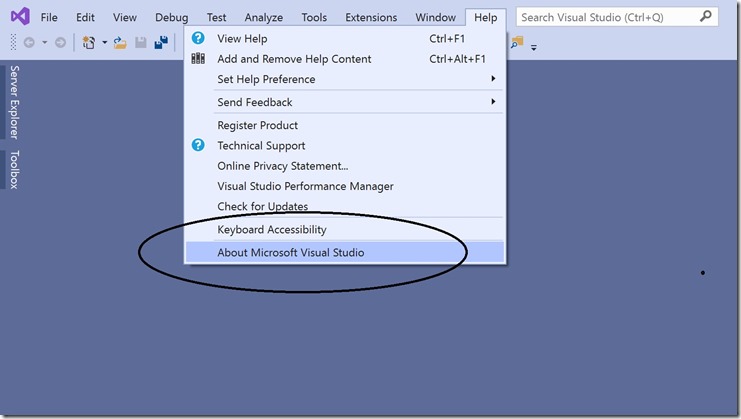
Click on the Help->About menu item:
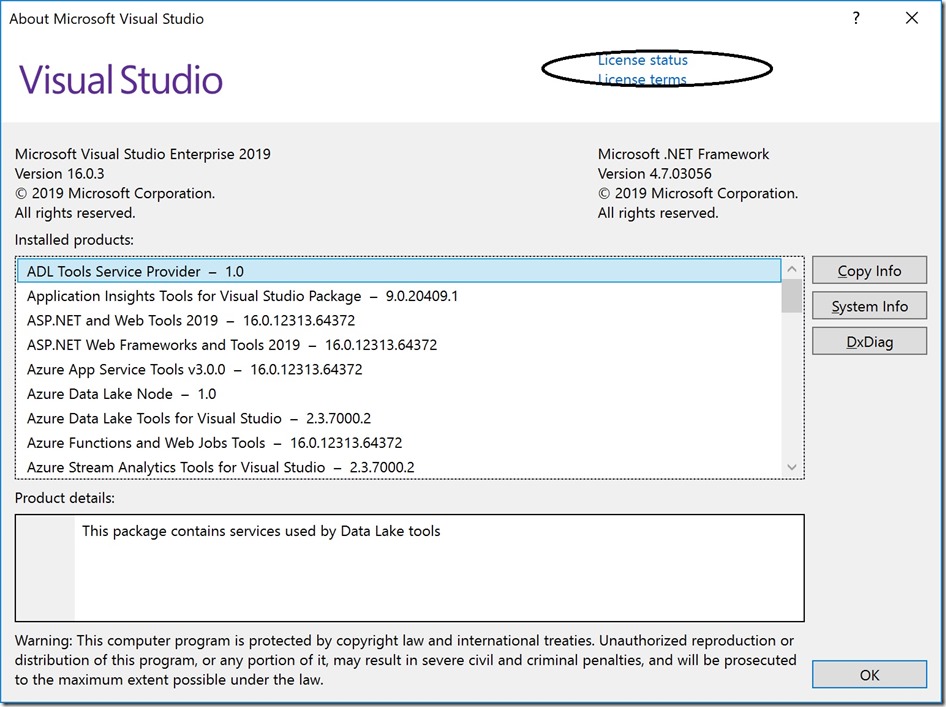
Once the help screen loads, they’ve made a sneaky change here, you need to click on the License status (very small text) at the top right of the dialog:
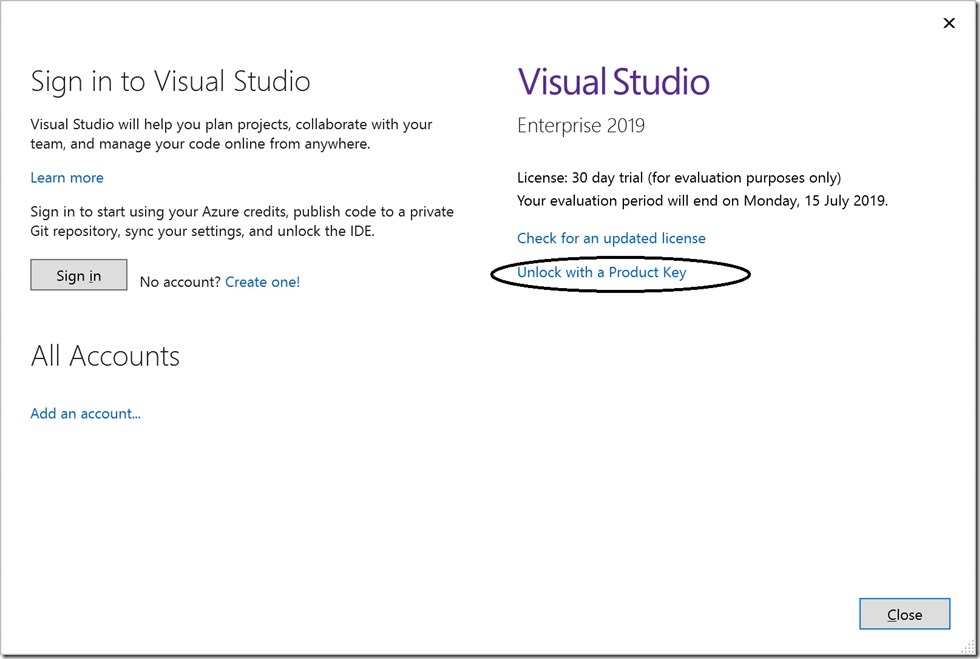
This renders the VS license dialog and we get our first mention of “product key”. Click on the “Unlock with a Product Key” link:
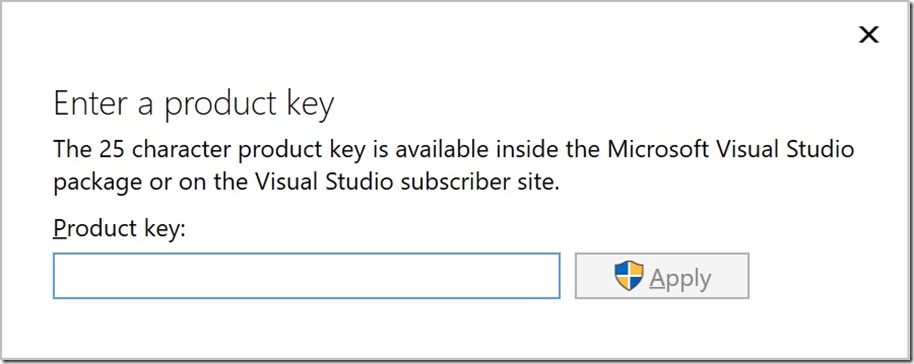
From here, enter the key you have obtained from MSDN (my.visualstudio.com) or wherever you acquired it from.
Note that this step requires privilege, so you’ll need local admin permissions available.

