As un-Architect as it sounds, I still very much like to stay “hands on” when it comes to hardware and software. Particularly, I like to hand build my personal machines so I can stay current with advancements in hardware.
You may recall from the previous post, I’ve been planning on putting together a new machine featuring a 4th Generation i7 CPU. Last night I put project “new machine” into action.
With dreary-eyed onlookers monitoring my movements from the sanctity of a comfortable vantage point on the couch, I slowly and carefully unboxed the various components.
I’ve listed the final components in a table below. The build took a few hours as I wanted to be very meticulous and be very careful with the cabling.
New Server Specifications
| Component | Details |
| CPU | Intel BX80633I74930K Hex Core i7-4930K 3.4Ghz 12MB LGA 2011 CPU |
| Heatsink | Cooler Master Hyper 212+Universal |
| Motherboard | Asus P9X79-LE LGA 2011pin/8XDDR3/3XPCI-E/SATA3/USB3 ATX |
| Memory | 2x G.Skill Trident-X 16GB Kit (8GB x2) DDR3-2133 |
| Case | Thermaltake VP200A1W2N Black USB3.0 Mid Tower |
| PSU | Antec HCG-620M 620W ‘Modular’ Gaming PSU |
| Graphics | ASUS GT610-SL-1GD3-L 1GB GT610 PCI-E Card |
| HDD | <Previously Used> |
Build Review
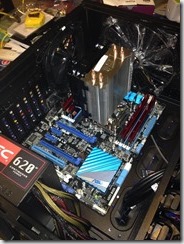
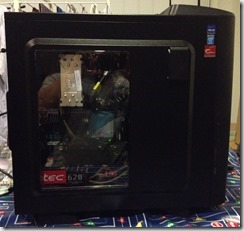
We have a new Thermaltake ATX mid tower, it’s nothing special to look at, but large enough internally to take a decent sized heat sink and an array of large graphics adapters. The cabling is neat, the idea is cables are thread through from the open side to the back of the board, via slots in the case.
This allows for easy cabling to the components (drives, optical devices etc) which are mounted perpendicular to the motherboard i.e. right to left facing when looking straight on at the front of the case. There’s a large fan built into the top of the case which apparently allows also for expansion.
 First off, I just want to say how remarkably massive the heatsink is. It stands approximately 17.5cm (175mm) tall and just barely clears the case width, once the motherboard and sink are mounted.
The sink itself came boxed with a plethora of bolts, risers and adapters, but for the LGA 2011 socket, it barely needed anything other than four socket risers.
It was a bit finicky getting the sink seated correctly over the CPU, largely due to the fascinating – yet frustrating – way that the sink is “locked” into place. Initially, I put the massive sink mounted fan rearwards, but moved it forwards facing later. Note: the thermal paste is toxic, so avoid exposure to skin etc.
Another interesting observation: the components are bright and visually compelling. It’s in stark contrast to the dull, uninteresting motherboards of yesteryear. The internals are actually interesting to look at, although I suspect over the next half decade the bright and shiny sheen will have been replaced by layers of dust.
 The main motherboard construction, aside the heatsink, was a breeze to configure. I typically mount the CPU and memory before moving the board into the case. From here it was plain sailing – bolted the motherboard with no issues, set the budget PCI-e video card (a cheapie – didn’t even require AUX power).
The “half way” point was about the time I started configuring the board’s jumpers. The case came with a set of instructions which were “marginally” helpful, the ASUS motherboard’s instructions, thankfully, were far more informative. It took a little guesswork on my part to determine what was what, but finally I had everything connected.
With one exception. I forgot the 8-pin ATX power connector at the top of the motherboard. Consequently, when powering on the CPU_LED lit. This is what’s known as a ‘false positive’, and led to me re-inspecting the CPU and heatsink, and also flashing the motherboard BIOS to the latest version.
That was an interesting discovery – you can now update the motherboard BIOS using a USB stick, without even powering (booting) the motherboard. The board must be powered, but from there, you simply hold down a small button on the board and it will detect and install a newer BIOS.
The trick is the key must be FAT16 or FAT32 formatted, and the BIOS update must be named correctly according to your board’s instruction manual. The stick must be slotted into the correct port on the motherboard – it’s usually clearly labelled. The instruction/user guide usually will detail how this works, it’s best to read carefully before flashing a BIOS.
Once I realised the mistake, and corrected it – everything powered on perfectly, first time.
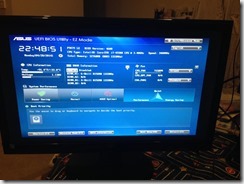
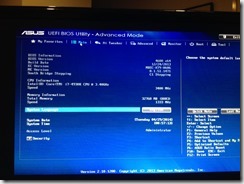
This motherboard features the first “graphical” BIOS that I’ve ever seen. It’s still very BIOS-like, and most of the options are keyboard preferred, but I like the basic layout, with the option to go ‘Advanced’. There wasn’t much initially to do in the BIOS (except reduce the fan intensity).
The advanced menu lets you override virtually every setting, although it doesn’t offer an ability to format or play with SATA disks, which is a shame since I was repurposing disks from a former RAID configuration, and they weren’t being recognised later during OS installation.
I still have some additional “tweaking” to do (such as setting the correct memory frequency) however, this is the end of the hardware build review.
Summary
To summarise – the case is underwhelming, but very neat and well laid out. It won’t turn people’s heads, but it does an OK job of keeping things cool and has heaps of room for expansion.
The CPU installation is straightforward, but you need to plan accordingly for a large heat sink – this can require a lot of room. If you hit trouble, just make sure you’ve set all the cables and jumpers correctly and haven’t missed anything – it can derail you for a sizeable amount of time if you aren’t paying attention.


